Sunday, November 13, 2011

Chocolate "ChipChunk" Cookies

I love chocolate chip cookies! The smell that fills the house while they're baking should be bottled. I'm completed in love with the chocolate chip/chunk cookes from Zoe's Kitchen. One bite and you have to take a moment to regain your composure. I'm not kidding. I wanted to try to duplicate them (which is absolutely impossible) but thought I'd give it a try. They were very tasty. Not Zoe's. However, my family gobbled up as many as I'd let them have!

Ingredients
2 sticks unsalted butter at room temperature
1 cup light brown sugar, packed
1/2 cup granulated sugar
2 teaspoons pure vanilla extract
2 extra-large eggs at room temperature
2 cups all-purpose flour
1 teaspoon baking soda
1 teaspoon kosher salt
1 1/2 cups chocolate chips
1 cup semisweet chocolate chunks

Directions
Preheat the oven to 350 degrees.


Cream the butter and two sugars until light and fluffy in the bowl of an electric mixer fitted with the paddle attachment. Add the vanilla, then the eggs, one at a time, and mix well. Sift together the flour, baking soda, and salt and add to the butter with the mixer on low speed, mixing only until combined. Fold in the chocolate chips.
Drop the dough on a baking sheet lined with parchment paper, using a 1 3/4-inch-diameter ice cream scoop or a rounded tablespoon. Dampen your hands and flatten the dough slightly. Take about a tablespoon of the chocolate chunks and press them into the top of the unbaked cookies. Bake for exactly 14 minutes (the cookies will seem underdone). Remove from the oven and let cool slightly on the pan, then transfer to a wire rack to cool completely. Makes 2 dozen cookies.


Mixing the butter and the sugars.
Once fluffy, mix in vanilla and eggs.


Add flour, salt and baking soda mixture to butter mixture.


Add chocolate chips. Don't overmix!


You can buy chocolate chunks, but I had a big block of chocolate I had to chop up.


I use a cookie scoop to measure out the cookie dough onto the cookie sheet.
Please, notice the silpat on the cookie sheet. It's awesome!!! A great investment.
If you don't have one, use parchment paper or a nonstick cookie sheet.

All measured out.

Lightly dampen your fingers and press the dough down slightly.
Add as many chocolate chunks as possible to the tops of the cookies.
Be generous!
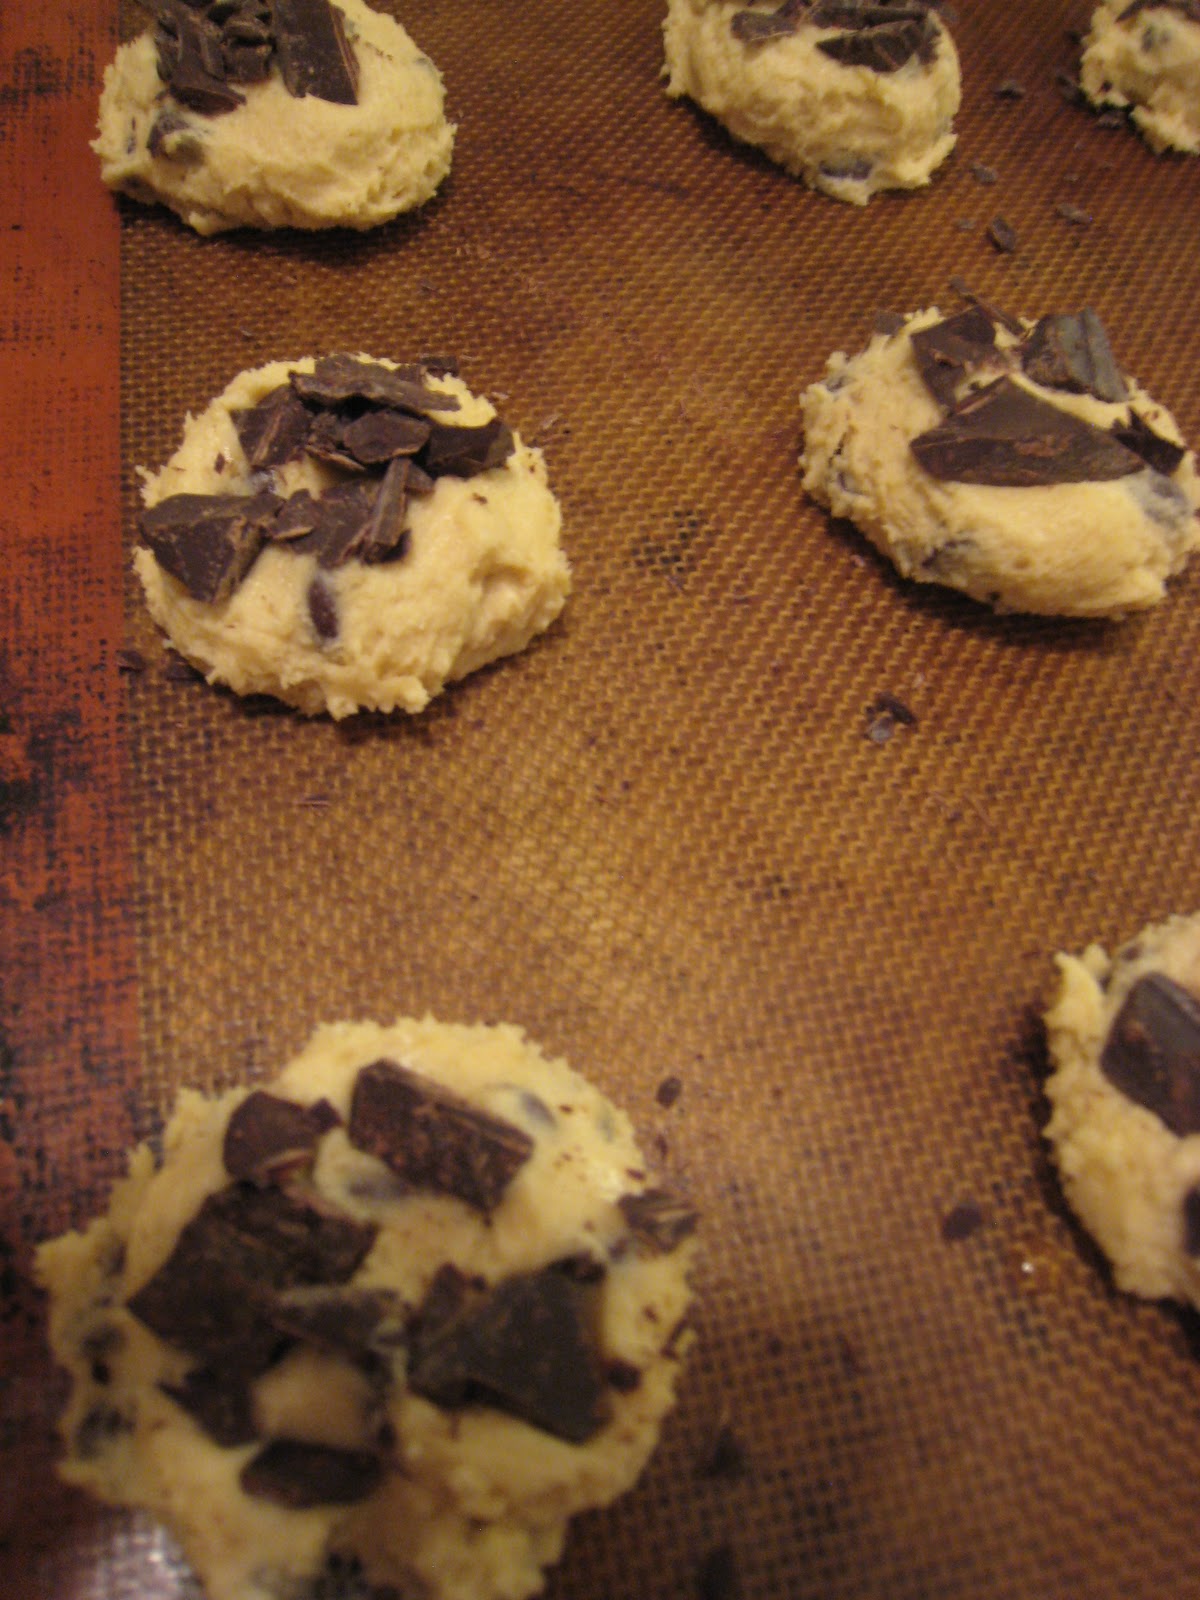
Ready for the oven!
14 minutes later...cooling on wire rack.
Chocolate "ChipChunk" Cookies and Milk. Good night!

Israeli Couscous with Dried Cranberries

I've been loving anything having to do with cranberries lately. Not sure if it's the pregnancy cravings or knowing that Thanksgiving is just around the corner, but I've been looking for every excuse to incorporate them into as many dishes as possible. I love the cranberry sauce from Trader Joes! It's beyond yummy..all natural, no high fructose corn syrup, not that weird jellied stuff with can marks on it. You don't slice this stuff, you delightfully spread it.  I bought two jars a week ago and one is almost gone! It's been going on every turkey sandwich consumed in this house! I will make homemade cranberry relish for Turkey Day, but the spread in the jar is working out just fine for now. Okay, now that I've confessed my love for TJ's cranberry confection, it's time to talk about the Israeli Couscous I made to go with our Grilled Honey Glazed Pork Tenderloin tonight. I always have people ask about this recipe and have always had some trouble telling people how to make it because I just made it up and never took the time to write anything down. I'm going to give it a shot. FYI:  This is a dish packed with "super foods" such as spinach, cranberries, almonds and olive oil. It would also be delicious with roasted chicken or lamb chops! Here you go!
The ingredients minus the lemon, fresh mint, olive oil and seasonings.

Saute the shallots with 1 tablespoon of butter and about 2 tablespoons of olive oil over low heat.

Add 1 teasoon of kosher salt and 1 package (about 12 ounces) of Israeli Couscous.
Brown the couscous in the saute pan with shallots for about 3 minutes

Add 2 cups of low sodium chicken stock to the shallots and couscous mixture.
Bring to a low boil, turn heat to low and partially cover. Cook until the stock is absorbed and the couscous is tender

Add about 2 cups of fresh spinach. Stir into couscous until wilted.
Season with fresh ground pepper (about 1/2 teaspoon).

The spinach all cooked into the couscous...now to make it really happy...
Squeeze the juice of 1/2 a lemon into the couscous.


Remove the couscous from pan to a serving bowl.
Grate in the zest of 1/2 a lemon. Stir it up!

Chop about 1/4 cup of almonds and mix it into the couscous.


Stir in 3/4 cup of dried cranberries and chopped mint.
 If it gets too sticky, just add more lemon juice and olive oil.
Enjoy!!!


It's Good to Be Back!

It's been 8 months since I've posted anything! Shame on me. All I can say is that life got really busy. Busy in that I'm nearly 8 months pregnant with baby number three! Third time must be a charm because this little bambino is a boy!! The girls are so excited to both be big sisters and we're so excited to throw some blue into the endless sea of pink around here. My poor husband deserves the playing field being evened out a little. Baby boy is due around January 22nd. I'm officially on the 10 week countdown and could not be happier about that! Being preggers while running around after a 3 year old and a 5 year old is a bit taxing at times. Who am I kidding? It's completely exhausting, but I can see the light at the end of the tunnel!! I'll keep everyone updated on all the joys and pains of the homestretch. Please, hang in there with me! Thanks for sticking around.

Friday, March 4, 2011

Long Time, No Talk

I know, it's been forever. Lots of catching up to do!
I've been super busy sewing, baking, mothering, wifing (sp?)..etc.
I finally got my Etsy shop up and running. I'm also selling some of my baby items at Everyday Art Gallery in Reidsville, NC. I had a little deadline due to their Gallery Open House this weekend. It's a great place, a hidden treasure tucked away in downtown Reidsville. Check it out: http://www.everydayartgallery.com/

Here's a link to my Etsy shop if you're interested in browsing or to just see what I've been up to lately.
http://www.etsy.com/shop/Tylergrey

By the way, Happy March!! Spring is just around the corner!
Have a great weekend!

Here's some eye candy for ya...


Friday, February 11, 2011

Happy Friday!

Probably not the best picture of the girls, but they were (gasp!) chewing bubble gum! The only way I would let them have any was if we all sat in the floor together and chewed it. That was the only way I could keep a close eye on them. I normally don't allow gum (they're way too young) but it was a special treat from their "gamma" and they were so cute while chewing it...it's the simple things! Happy Day to you all!

Thursday, February 10, 2011

Whipped Up Some New Pillow Covers

If I think of this house as a whole when it comes to decorating, it totally overwhelms me. My head starts to spin. It's hard to organize my thoughts at times because there are so many projects I need to tackle. Therefore, I'm trying to take it room by room. Starting with the rooms that we spend the most time in. That leads us to the den, right off the kitchen. This room has become the "main hub" for the house. It's our daytime living room. The girls play in there most of time even though they have a HUGE playroom...ugh! and watch cartoons there. I love the den. It's the main entry to the house for us 99% of the time. It needs to make a statement...you know that whole "first impression is the lasting impression" thing. When we got the house, it had floor to ceiling dark wood paneling. Not the cheap stuff, the real deal. Lots of people told me I was crazy to want to paint it, but it was entirely too dark for our taste. It was one bear skin rug away from looking exactly like a ski lodge. There is nothing wrong with that, but I didn't want it to feel dark and sleepy all the time, nor did I want to feel the need to hang dead animals all over the walls. It was a bear (no pun intended) to paint. We had to use an oil based primer (which stinks to high heavens if you didn't already know) and put 3 coats of paint. I chose Valspar's Antique White in a Satin Finish. We love the way it turned out! So happy we stood our ground on that decision. For some reason, I can't find any of my before pics. I'll work on that. However, here's a glimpse of the den now.
                       
We still have LOTS to do, but at least it got a fresh coat of paint.

As far as the throw pillows go, here's what I came up with. It literally took me less than an hour to sew these.


I always LOVE stripes...even in clothing!!

Love this print! Found the fabric at good ole' Hobby Lobby.
I did an easy envelope closure on the back.
I didn't want to hassle with a zipper.


New pillow paired with a starburst pattern pillow I got at Target last summer.

I've been sewing lots of pillow covers lately because
I'm trying to get an Etsy shop up and running.
I want a good inventory first. (I'll post more on that later). Isn't it great how something as simple as a pillow cover can light up a space!?

Wednesday, February 9, 2011

The Family Jewels

I've been looking at the biggest mess on top of my dresser for 3 months. Necklaces and bracelets scattered everywhere and earrings overflowing out of a Tiffany's box. (Hadley insists on us keeping all the little blue Tiffany's bags and boxes...hey, the girls knows what she likes.) Simply no order to any of it and that drives me crazy. To top it off, I just picked up some fun new things for springtime (if it ever arrives) and now I really have a shortage of space for it all. What's a OCD girl to do for fashion?! Here's what I came up with for the necklaces. Mind you, these are "fun" necklaces. The good stuff is put away safe and sound where my two little burglars won't snatch them.

I had this shadow box frame which I've had for years. It had some honeymoon memorabilia in it. Well, the honeymoon is over.   Joking. I can toss that stuff in a photo album and use 
the box for something a little more practical and lot more functional. I emptied the contents, cleaned the glass and dusted it off. Next, I rounded up some really big, metallic covered thumb tacks. I placed the tacks staggered at various heights....and this is what I came up with:

Happy in their new home. Keep reading for where its final destination will be.


Next, onto the earrings. I weeded out the ones I don't wear much anymore. I really just wanted a place for the bigger earrings to hang. They tend to be awkard in a jewelry box. I'll keep the nicer, everyday earrings in a safe spot away from little sticky fingers....Here's what I came up with:


 I happened to have all these Supplies on hand:
Corkboard (purchased from Target)
Hot Glue Gun (imagine that)
Fabric ( I had some scrap pieces from where I cut some curtains off. It was neutral linen, which I liked)
Old frame
Scissors
Pen
Straight Pins


First, I measured how big the corkboard needed to be.
I used the glass from the old frame and traced a line to cut on.

Cut your corkboard to size.

Cut your fabric to fit the corkboard with about 1 inch all around for overhang.
Apply the hot glue and secure the fabric to the back of the board. Pull it tight so it will come out smooth.

This is what the front will look like after it is glued on the cork.
Pop it into your old frame (without putting the glass back) and put the back on the frame.


Put your straight pins in the cork and hang your lovely jewels!


Conveniently, hanging on the wall beside my dresser.


Here's a shot with the door open. It's nice that you can enclose them away from those little grabby hands.
I hung the earrings higher so the girlies couldn't reach them.
I feel certain all this effort will go to waste. They'll find a way to get into this.

Pretty pleased with how it turned out.
Tidy dresser with all my jewels secure, safe and sound...for now.